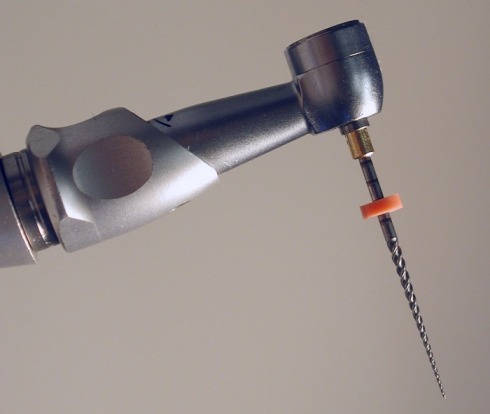
K3: Recommended use


The following instructions are a brief guide for preparing the majority of root canals. Larger canals require less preparation in the coronal and middle portions but more cleaning with sodium hypochlorite. The guidelines below follow the principles of a step-down technique.
1. Place rubber dam and cut an access cavity. Ensure there is straight-line access into at least the coronal portion of all the canals.
2. Insert a size 10 Kfile into each canal to check there is an unobstructed pathway for at least 1/2 to 3/4 of the estimated canal length. Canal length estimated from pre-operative radiograph.
3. Place an Orifice Opener taper 10 into the canal(s) and penetrate for a few millimetres. Speed 250 rpm and using a slow gentle in and out movement
4. Place an EDTA lubricant into the canal opening(s). Work an 08 taper orifice opener 3-4 mms further into the canal.
5. Irrigate with sodium hypochlorite using a gauge 27 or 30 irrigation needle.
6. Measure the working length of the canal with a Kfile with the aid of an apex locator or a radiograph. Establish apical patency by passing the 10 Kfile passively through the apex by no more than 1.0mm.
7. Begin filing with K3 06 tapered instruments. Speed 200-250 rpm using light even pressure with a slow in and out movement. Use each instrument for no more than 6 seconds.
8. Files used in sequence from the largest to the smallest. Place silicone stops on the instruments at the working length. Start with size 35, then 30, 25, 20, in a run down to size15. Repeat the step-down from size 35 until size 20 reaches the working length.
9. Irrigate after alternate instruments and at completion of filing
10. Check apical patency with size 10 Kfile.
Difficult fine and long curved canals
For those occasional difficult canals which are long, very fine and curved use both 04 tapers and 06 tapers.
Open the coronal and middle thirds as described above, the use K3 starting with size 30 06 followed by 30 04, then 25 06 followed by 25 04, and finally 20 06 and 20 04. If this method does not reach the working length then widen the guide path with hand Kfiles from size 10 to 15 and then 20 at the full working length. Another run of 06’s and 04’s from 30 down to 20 will complete the preparation.
K3 G-Pack (Graduating Taper) Instrumentation Guide
1. Obtain Straight-Line Access using the LA Axxess kit.
2. Locate the canal orifices and obtain coronal patency using hand files.
3. Begin Crown-down by taking the .12 Taper K3 Shaper to resistance (the .12 Taper K3 Shaper is designed to open the orifice only).
4. Take the .10 Taper K3 Shaper to resistance.
5. Establish working length. Establish this with your Elements Diagnostic Unit. A radiograph may be taken to assist in working length determination.
6. Take .08 taper K3 Shaper to resistance.
7. Take the .06 Taper #25 K3 File to resistance. Many canals will be finished after this step.
8. In more difficult, curved and narrow canals you have the option of using a .04 Taper #25 K3 File and a .02 Taper #25 K3 File until working length is achieved. Recapitulate back to .04, then .06 taper, if possible.
9. Take each instrument to resistance at 300-350 RPM in an electric torque control motor, using each instrument for no longer than 5-7 seconds.
Clinical Tips
• Establish a glide path with hand files. Confirm patency between all rotary files with a #08 hand file.
• Irrigate copiously, alternating between sodium hypoclorite and SmearClear (17% EDTA containing antimicrobial and wetting agents).
• Use very light pressure. Never force instruments to working length.
• When the instrument no longer advances apically, proceed to the next smaller taper.
• Note: The G Pack will work in many cases, but all canals differ in size and shape so additional sizes of K3 Files may be required.
K3 Procedure Pack Instrumentation Guide
1. Obtain Straight-Line Access using the LA Axxess kit.
2. Locate the canal orifices and obtain coronal patency using hand files.
3. Begin Crown-down by taking .10 Taper K3 Shaper to resistance.
4. Take .08 taper K3 Shaper to resistance.
5. Estimate apical size.
6. Begin Crown Down using a size #40 K3 File.
7. Establish working length. Establish this with your Elements Diagnostic Unit. A radiograph may be taken to assist in working length determination.
8. Complete Crown Down preparation with a #35 K3 File, #30 K3 File, #25 K3 File, by taking each instrument to resistance at 300-350 RPM in an electric torque control motor, using each instrument for no longer than 5-7 seconds.
Clinical Tips
• Establish a glide path with hand files. Confirm patency between all rotary files.
• Irrigate often, alternating between sodium hypoclorite and SmearClear (17% EDTA containing antimicrobial and wetting agents).
• Use very light pressure. Never force instruments. When the instrument no longer advances apically, proceed to the next file.
• The Procedure Pack will work in many cases, but all canals are different and additional sizes of K3 Files may be required. You will want to begin with a K3 File 3 sizes larger than your estimated apical diameter.